Using Web Email - POP3 Mail Accounts
AVSpamfilter's Web Email for POP3 allows you to:
- Read, reply, forward and compose emails
- Store and retrieve emails from custom folders you create on the mailserver
- Store email addresses in your personal address book.
- Keep track of important events with your personal calendar
- Manage projects with To Do lists
- Monitor NOAA weather forecasts and get detailed forecasts for multiple locations
In this tutorial we'll show you how to retrieve your email, compose new emails, reply to emails and how to use remote folders on the mailserver. This web email program has numerous other functions which you can explore by examining the preferences, folder options and other menu items.
Accessing Web Email
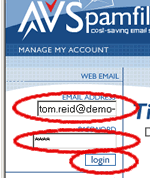
1. Enter your email address and password in the Web Email box directly under the AVSpamfilter banner. Then click on the Login button.
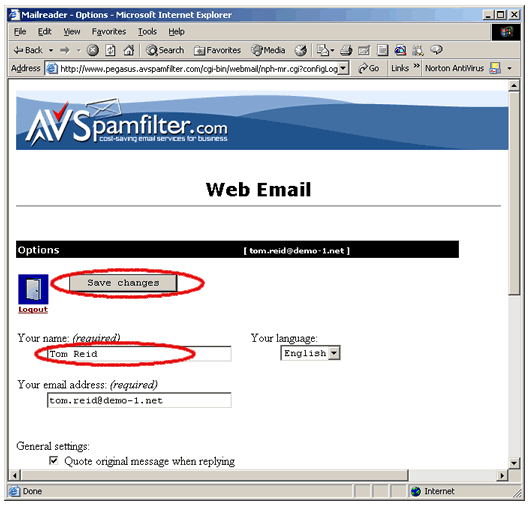
2. The first time you use webmail for POP3 you will be shown the Options page. You must enter your name in the space provided. Then click on 'Save Changes'. You can come back to the Options page at any time to change other configuration parameters.
A Quick Look at the Controls
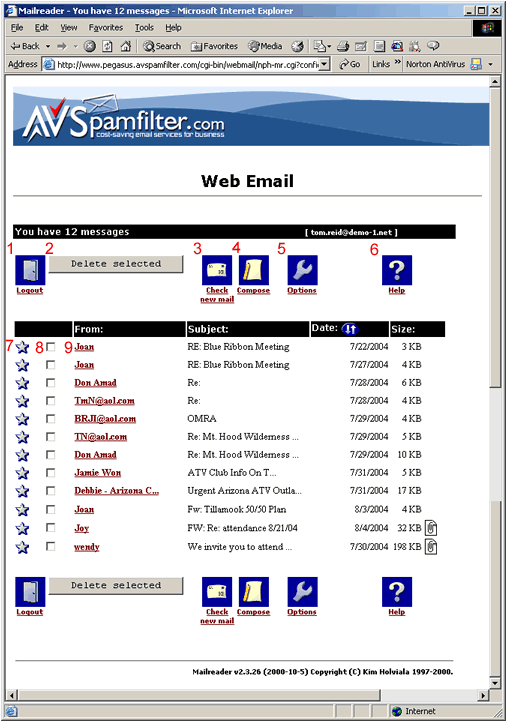
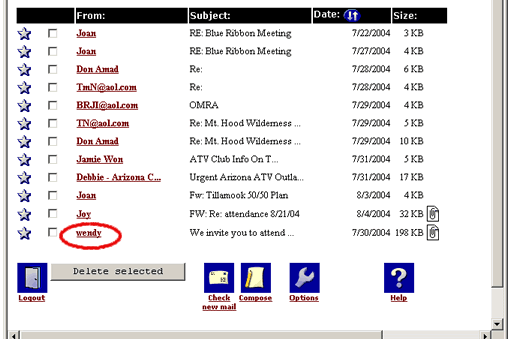
1. Here's a snapshot of the main POP3 Web Email screen. We've numbered the major controls:
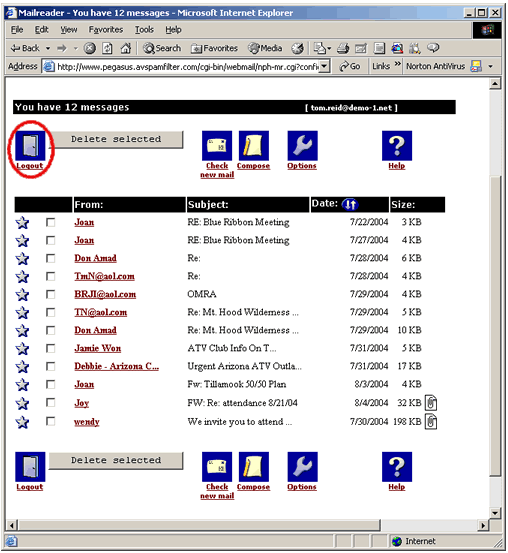
- Logout button. Always end your webmail session by clicking on the 'Logout' button. Your changes, deletions, etc. will not take effect unless the 'Logout' button in clicked.
- Deletion button. To delete an email first select it with the checkbox and then click on 'Delete Selected'.
- Check for new mail.
- Compose button. Click here to create a new email
- Options button. Click here to change the default language, change your return address, add a standard signature to your emails.
- Help button. Click here for instructions and help screens.
- Star indicates a new message that has not been read.
- Select checkbox. Check here to select an email for deletion.
- Click on the sender to read an email.
Reading Email
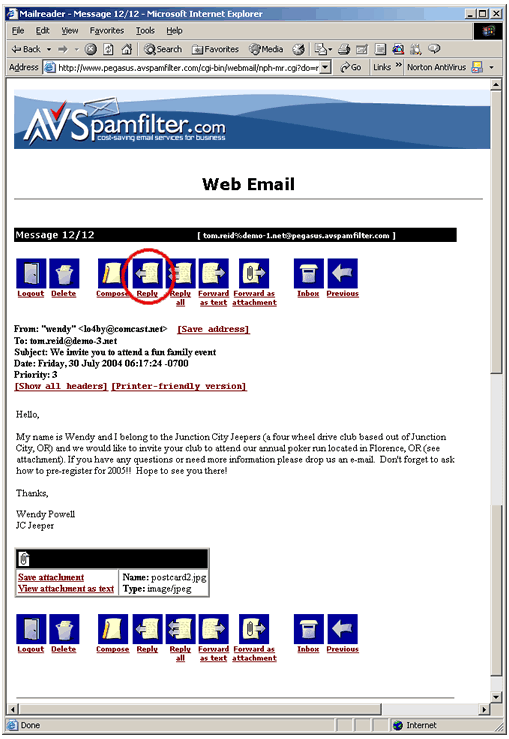
1. Click on the email you'd like to read.
2. The email opens for reading. The controls that are available when reading an email are as follows:
- Logout button. Always end your webmail session by clicking on the 'Logout' button. Your changes, deletions, etc. will not take effect unless the 'Logout' button in clicked.
- Deletion button. To delete an email first select it with the checkbox and then click on 'Delete Selected'.
- Compose button. Click here to create a new email
- Reply. Click here to reply to the sender.
- Reply All. Click here to reply to the sender and copy all recipients of the original email.
- Forward. Click here to forward this email to a new address.
- Forward as an Attachment. Click here to forward this email to a new address as an attachment to the email you send.
- Inbox. Click here to return to the Inbox.
- Previous. Click here to move to the previous message. The Next button, not shown, will take you to the next message.
- Show all headers. Click here to see the detailed email headers. The header will list the mailservers this email passed through and show any special comments provided by the mailservers.
- Printer Friendly Version. Click here for a version formated for printing.
- You can save attachments to your PC for later viewing or display them as text.

Replying to an Email
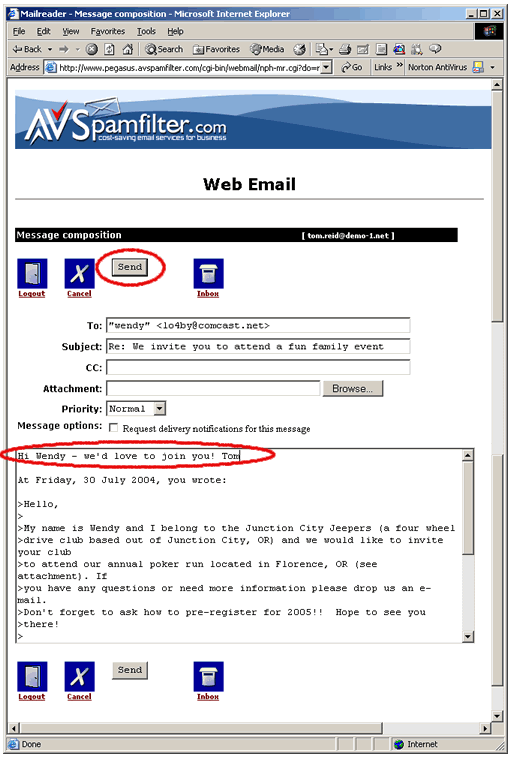
1. Click on the Reply button.
2. Click at the top of the compose box and enter your reply. If you have any attachments, you can add them using the browse box at the top. Then click on 'Send.'
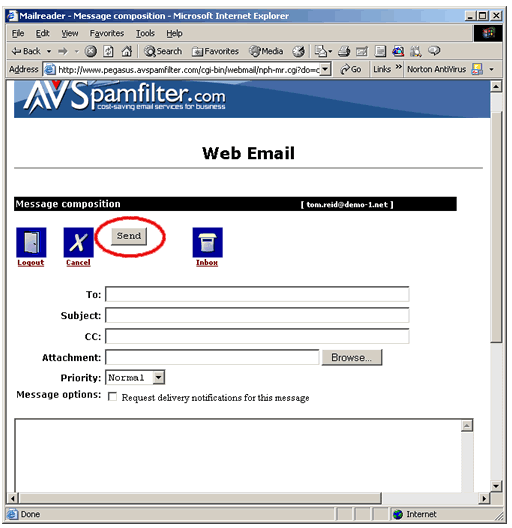
Composing an Email
1. Click on the Compose button.
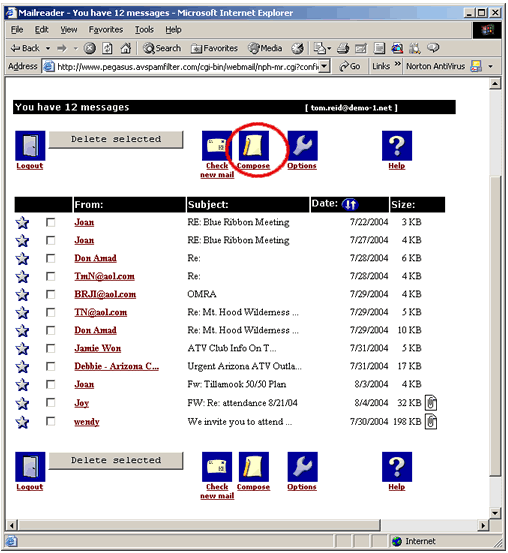
2. Here's the email compose screen. Enter the recipient's email address, any 'cc' or 'bcc' addresses, the subject and body of your email. Then click on the Send button. You can add attachments using the browse window.
Logging Out
1. When you are finished be sure to press the Logout button. Otherwise your deletions will not take effect..