Email Forwards and Aliases - Pop3 and IMAP Mail Service
In this section we'll show you how to:
- Add a new email alias or forward
- Forward emails to multiple addresses
- Modify an existing email aliases or forward
- Delete an email alias or forward
An email alias or forward is an email address that accepts mail and then forwards the mail to one or more local or remote email accounts. For example, you could setup 'sales@demo-3.net' as a forward and have mail sent to that address forwarded to 'jane.reid@demo-3.net', 'tom.reid@demo-3.net' and 'john@remote.com'. In that way three persons can keep track of sales queries.
In this system an email 'forward' and email 'alias' mean the same thing.
Add a New Email Alias or Forward
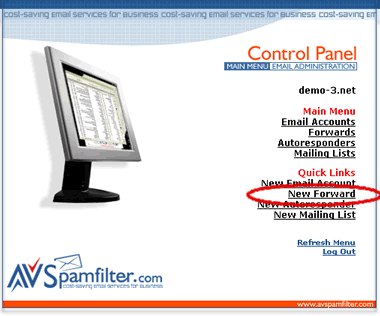
1. Click on 'New Forward' in the Main Menu.
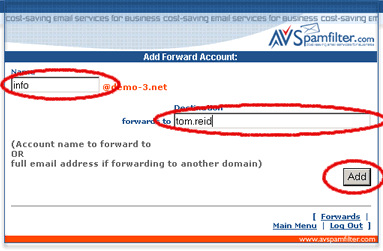
2. Enter the forward or alias name (for example, 'sales' or 'info') and where you want the mail to be forwarded. Then click on the 'Add' button.
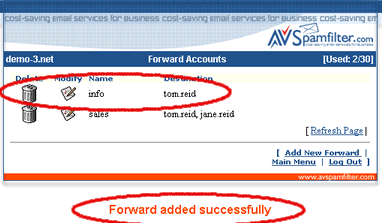
3. If successful you'll see the action message in red (below) and the new forward will be added to the list of forward accounts. Otherwise check that the forward account name does not duplicate an existing email, forward, autoresponder or mailing list name and try again.
Forward Emails to Multiple Addresses
1. Click on 'Forwards' in the Main Menu.
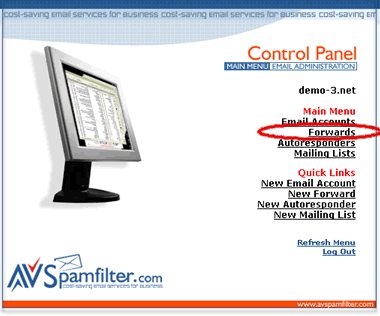
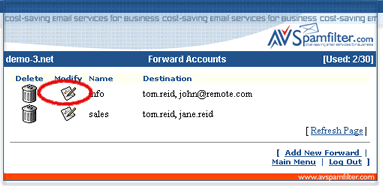
2. Click on the modify icon for the forward you wish to add another email address.
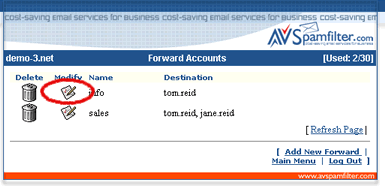
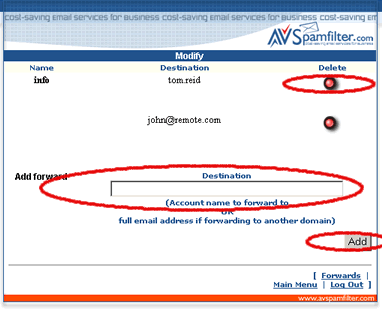
3. Enter the email account name or the full email address. And click on the Add button. In this case we are forwarding a second copy of email addressed to 'info@demo-3.net' to 'john@remote.com'.
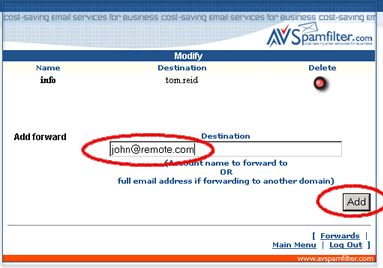
4. If successful you'll see the action message in red (below) and the new forward will be added to the list of forwards for the 'info' account. Click on the 'Forwards' link to see the full list of Forwards.
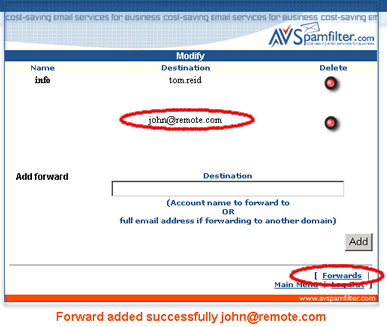
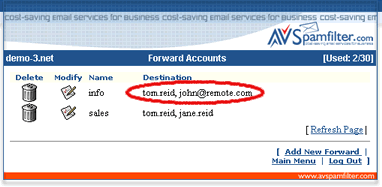
5. The additional forwarding address also appears on the list of Forward Account.
Modify an Existing Email Alias or Forward
1. Click on 'Forwards' in the Main Menu.

2. Click on the modify icon for the forward you wish to modify.
3. You can click on the delete icon to remove a forwarding destination or enter an additional forwarding destination.
Deleting an Existing Email Alias or Forward
1. Click on 'Forwards' in the Main Menu.

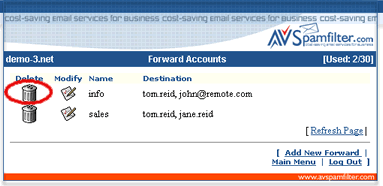
2. Click on delete icon for the forwarding account you would like to delete.
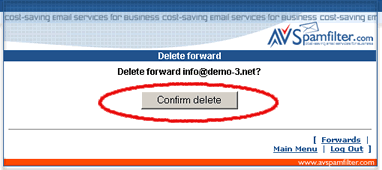
3. Click on 'Confirm Delete' in the confirmation window.
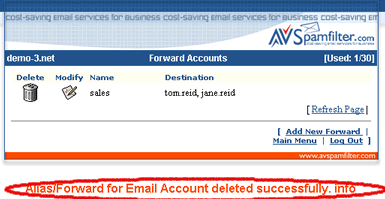
4. If successful you'll see the action message in red (below) and the forward was removed from the list of forward accounts.
